
Congrats — you just grabbed the 1-3-5 On-Ramp System!
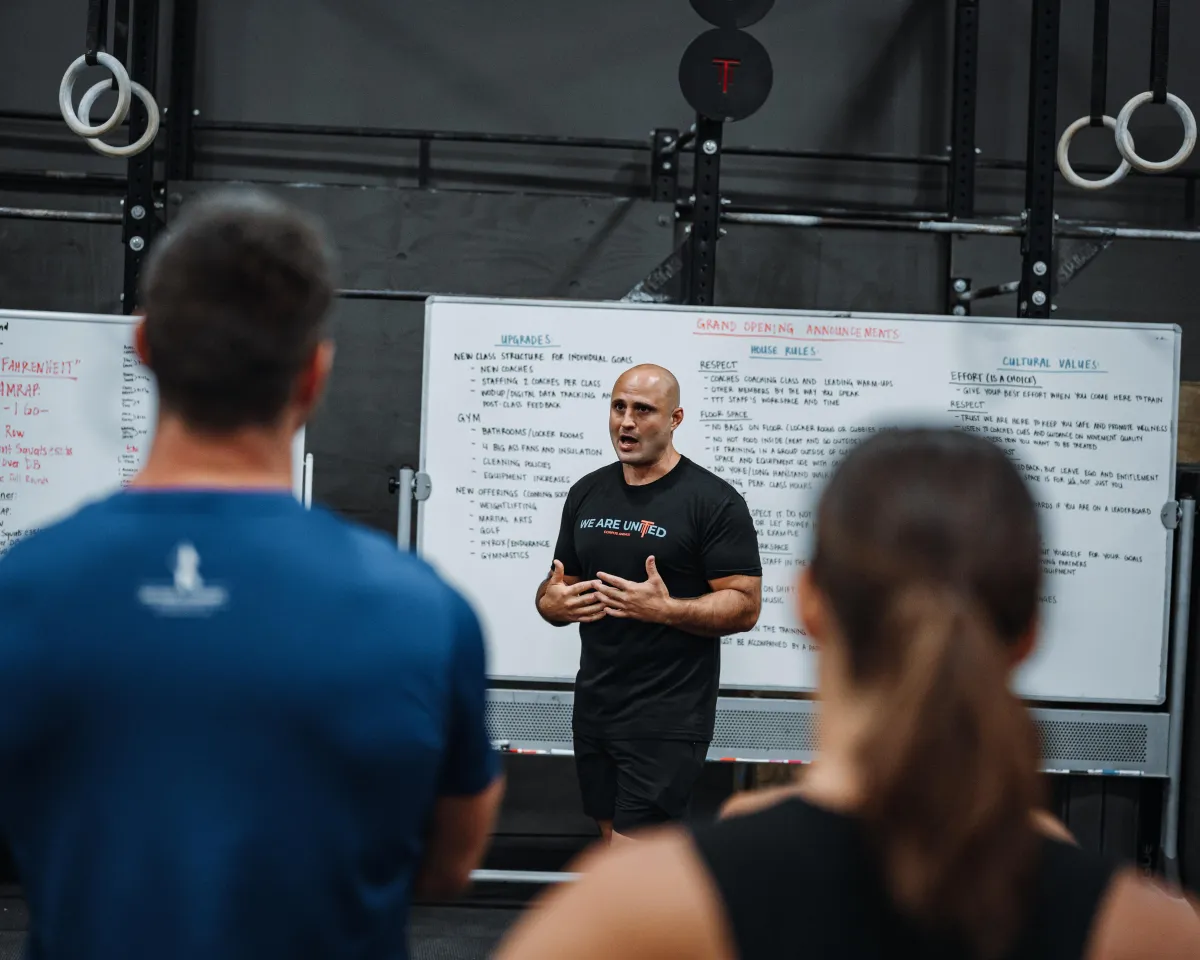
This is one of the exact tools we use with affiliates to help them retain more members and align their coaches. Over the next few days, we will also send bonus educational content, so be sure to check your email.
How To Apply The System In Your Gym
Listed below you’ll find videos and detailed descriptions of the system.
We suggest this on-ramp system be applied in a one-on-one setting to create a strong relationship with the member. However, in some cases grouping new members that have similar priorities together could be a good experience as long as there is enough personal interaction and quality instruction for each individual.
In this system, you will run a 1-day, 3-day, or 5-day 1-on-1 class to onboard new members.
This 3-tier system allows you to meet the client where they are at, keeping them engaged but not overwhelmed.
We’ve found that if you try to cram a bunch of novel movements into a one-hour session with someone who’s never done a group class, you’re likely going to discourage them and have a hard time getting them to return.
On the other side, if you overcoach someone who has the experience you could lose their interest by not challenging them enough if they are potentially class-ready.
After an initial consultation where you ask them information about their training or exercise history and why they came to you, it will be easy to decide whether to run them through the 1-day, 3-day, or 5-day setup.
We suggest this on-ramp system be applied in a one-on-one to create a strong relationship with the member. However, in some cases grouping new members that have similar priorities together could be a good experience as long as there is enough personal interaction and quality instruction for each individual.
We recommend this on-ramp system as a paid product but understand if certain gyms have situations that benefit from it being a free offering.
Dive in, and when you’re ready to see how we build programming for gyms, grab a free 1-week sample.
1-Day On-Ramp
Fundamental Strength & Movement Tests | 15 minutes
1. Lower Body Screens
Air Squat Below Parallel
Forward Inline Lunge w/ No Lateral Sag/Knee Cave or compensation in the spine
Barbell Deadlift w/ No Lower Back Rounding
2. Pulling Screens
Ring Rows
Strict Pull-Ups
Chin Over Bar Hold
3. Pressing Screens
Push-Ups w/ No Midline Sag
Top & Bottom Dip Support Hold on Box or Rings
P-Bar Dips or Box Dips
Pressing Overhead without compensation in the spine
4. Inverted Tests
Wall Walk or Scaled Wall Walk
HS Hold on Wall or Tripod/Headstand Hold
Strict HSPU or Feet on Box Pike HSPU
*These are guidelines to assess strength & movement. It’s up to you to decide if they are ready for class based on where they land on the spectrum. This is not a pass/fail to decide if they can hop in or not.
CrossFit Class Specific Tests | 30 minutes
1. Snatch / Clean & Jerks
Assess skill and understanding of the Olympic lifts
2. Kipping/Beat Swings on a Bar
Review gymnastics kipping awareness
3. Box Jumps/Plyometrics/Double Unders
Asses bounding mechanics, body control, plyometrics ability
4. Wallball / Thrusters
Assess compound movements, timing, and core to extremity awareness.
*The goal here is to review higher complexity movements before giving them the go-ahead for classes. You don’t need to have them perform all of these based on time restrictions but choosing 1-2 of them to review will help you get a good idea of movement capabilities & experience.
Capacity / Mixed Fitness Tests | 15 minutes
Option 1
Run 1 Mile
Target: 10 min
Option 2
Row 2k
Target: Sub 9 min (Males), 10 min (Females)
Option 3
3 Rounds for time:
10 Bar Facing Burpees
10 Power Snatch - 95/65#
10 TTB
*10 min Cap
*These are just guidelines of basic examples for capacity tests. The goal is not to wear them out, but to assess their current fitness level, understanding of intensity/pacing, and if they are class ready.
3-Day On-Ramp
Day 1: Squatting, Hinging, Cleans | Time expected 60-75 minutes
Introduction of basic bracing mechanics in compound movements and gymnastics, squatting, hinging, cleaning (high hang only).
1. Teach Core:
Explain how bracing of the “core” involves creating 360 degrees of pressure. Demonstrate hollow position on the ground as well as standing bracing.
2. Teach Squat Variations (Air, Front, Back):
Air squat (stance, bracing, knees over toes)
Front squat (front rack, heel elevation if necessary, or goblet style setups as needed)
Back squat (teach the use of the rack, bracing, connecting to other squats, how to properly bail out or be spotted)
3. Teach Hinge Variations:
Hinging/deadlifting a KB (singular object allows the athlete to keep object inline with the body between the legs, correcting and FEELING contraction of brace and hamstring is key here)
Deadlift barbell (similar to KB but now the object is ever so slightly in front). Emphasize bracing and the PUSH into the ground rather than PULL off the ground. This allows the practice of staying connected to the ground.
*Can teach the burpee here if unfamiliar with the movement.
4. Teach High Hang Clean:
Sticking with the high hang clean allows the athlete to effectively learn how to use vertical momentum and stay connected with an object. Cleans are functional in a way that whenever you need to take an object to the shoulder, it is a clean (bag of dog food, bag of soil, a child, etc)
Keep vocabulary simple– don’t use weightlifting jargon unless needed. Jump and squat is a very simple drill that can be used without an object to teach an athlete how to generate upwards momentum and pull the body under. PVC can also be used in this progression (or empty hands).
The progression is very simple:
- Simple vertical jumps (small dip, hard jump)
- Simple vertical jump with high pull to ribs
- Simple vertical jump and ¼ squat (with or without elbow rotation if ready)
- Simple vertical jump and full squat (with or without elbow rotation if ready)
- Proceed with MANY reps of this mechanic, as the more you do, the easier it will be to teach the snatch
**If you have time and you feel comfortable putting movement into a higher intensity setting, have them perform a workout in a controlled setting as you cue/coach the movements.
IE: 7-10 min AMRAP:
10 Burpees - Jump & Clap
10 Single DB Goblet Squat
10 Double DB Hang Power Clean
*Coaches choice on loading/total time.
Day 2: Rowing, Pressing, Snatch, Intro to Kipping | Time expected 60-75 minutes
Short review of front squats, deadlifting, and cleaning
1. Rowing
Legs, arms, arms, legs ordering of the row stroke
Keep the shoulders in front of the hips during the drive and open the hip and shoulder at the back of the stroke
Teach the “feel” of the stroke as a leg PUSH and hamstring engagement at the catch vs just pulling hard
2. Overhead Pressing
Strict press
Push press
Push jerk
Split jerk (optional)
3. Snatch
The snatch is arguably the LEAST functional movement performed in CF classes. However, because of its frequency, build off of it like the “sister” movement of the clean.
Start with the overhead squat to check for bar position, and how comfortable the athlete is overhead (this can direct you to whether or not squat snatching is even an option to try)
After you discuss the grip of the OHS, teach the high hang (hip) snatch with the exact same progression as the clean (jump and squat) but now with the goal being to get the bar overhead vs front rack
4. Beat Swings + Knee/Leg Raises (Gymnastics)
Have athletes revisit hollow body & arch body (superman) positions on the ground. Then demonstrate how this is used while hanging from a pull-up bar
Guide athletes how to start the movement from the belly/chest area, then let it transfer to the push/pull of their arms.
There will be a large number of athletes that struggle with this, so start slow and be patient. Guide them with tactical cues by pushing that trunk and low back. Progress this into a kipping leg raise or knee raise, or keep it as beat swings depending on the athlete
5. Optional Higher Intensity
If you have time and you feel comfortable putting movement into a higher intensity setting, have them perform a workout in a controlled setting as you cue/coach the movements. Here is a suggested workout.
For Max Reps:
EMOM x 8-12:
Min 1: 30 sec AMRAP Row Calories
Min 2: 30 sec AMRAP TTB/Knee Raises/Abmat Sit-Ups
Min 3: 30 sec AMRAP SA DB Power Snatch, switch hands on floor
Min 4: Rest
*Coaches choice on loading, scaling of movements, and total time as needed.
Day 3: Compound Movements, Plyometrics, Gymnastics | Time expected 60-75 minutes
Short review of kipping, pressing, and snatches
1. Teach Thruster / Wallball:
Here you can connect the clean with some other compound movements.
Cue the athletes from the top of the thruster and down. Start with the initial squat clean thruster, pause overhead, then initiate each rep from the top of each thruster on your call
Build on the same concepts with the wall ball
2. Teach Bounding/ Plyometrics / Jump Rope, Double Unders, Box Jumps:
Start with basic bounding drills. Assess jumping mechanics via bunny hops & penguin jumps. Then add rope and monitor skill/athleticism with single unders/skipping rope. Explain hand position & wrist action, good jumping mechanics & bounding control.
Start at a low box height to test comfort jumping up to an object. Cue bracing, arm action and powerful drive of legs into floor, along with landing with confidence/placing feet on box during landing. Starting with depth drops from a low height can be a good idea if the member is hesitant to jump to an elevated plat form. This can help you assess lower leg strength and control when jumping down from an object. During the step up pay attention to single leg strength & mechanics.
3. Assessing Pull-Ups / Push-Ups:
The goal here is to assess upper body strength for push-ups & pull-ups. Start with testing basic ring row pulling patterns and then progress based on strength ability.
If pulling mechanics look strong progress to isometric holds with chin over bar and full range of motion pull-ups.
For the push-up, focus on the ability to maintain a stable midline when pressing off the floor without any sag. Cue hand position, and bracing the midline during the entire rep.
Move to knees if needed. Or progress to testing strength on the rings to increase the challenge of stability.
4. Assessing Inverted Awareness:
Start with an explanation of how to create a stacked overhead shoulder position. A screen that can be used to assess a member's overhead mobility and safety supporting body weight overhead is to do a seated cross-legged wall slide. If they are unable to keep their spine flat against the wall with arms almost completely overhead, modifications are suggested when doing inverted bodyweight movements.
A wall walk is a good test of inverted awareness and strength. Have them attempt a rep if comfortable to test stability and overhead position when upside down. Scale down how high up the feet climb to wall as needed. Cue bracing of the midline and creating a stacked shoulder position overhead when hips start to rise.
If they are comfortable being upside down on their head, using a wall as support, have them set into a tripod position to show strength & control being inverted with 3 points of contact. From there you can decide to progress to a handstand hold or handstand push-up test.
If time and you feel comfortable putting movements into a higher intensity setting, have them perform a workout in a controlled setting as you cue/coach the movements.
3-5 Rounds for time:
20 Wallball
15 Push-Ups
10 Pull-Ups
*Coaches choice on loading, scaling of movements, and total rounds as needed.
5-Day On-Ramp
Day 1: Squatting | Time expected 60 minutes
Areas of focus: Learning how to brace, learn how to squat (front and back squat), learn the burpee.
1. Explain how bracing of the “core” involves creating 360 degrees of pressure.
Use plank shoulder tap to demonstrate how to brace and resist flexion/movement. For added challenge difficulty, you can place a softball/lacrosse ball on the small of their back and ask them to shoulder tap from the plank without losing the ball. This will drive home the idea of creating rigidity.
2. Teach Squat Variations (Air, Front, Back)
Air squat (stance, bracing, knees over toes)
Front squat (front rack, heel elevation if necessary, or goblet style setups as needed)
Back squat (teach use of the rack, bracing, connecting to other squats, how to properly bail out or be spotted)
3. Teach Burpee
Demonstrate it in simplicity with just being a movement to get you from the standing to the ground back to standing, then demonstrate it with efficiency (leading with the chest, relaxed arms, hinged stance coming off the floor)
Explain common variations (bar facing burpee, burpee box jump over, burpee to touch)
Optional Piece
If you have the time and you feel comfortable putting movements into a higher intensity setting, have them perform a workout in a controlled setting as you cue/coach the movements.
6 Min AMRAP:
6 burpee - hands touch overhead
10 Air Squats (or FS/BS)
*Loading and implement based on coaches discretion
Day 2: Overhead Pressing | Time expected 60 minutes
Areas of focus: Learning how to press (strict, push, split)
1. Evaluate overhead mobility
Perform any necessary simple stretches or mobility drills to help the client get into a proper position
If the individual has poor shoulder mobility and using a barbell will put them at risk for injury, then use a db for all movements below
2. Teach barbell strict press
3 coaching points (lower body remains still, grip width is slightly wider than shoulders, press the bar straight overhead)
3. Teach barbell push press
3 coaching points (dip, drive, press = dip is vertical, shallow, and allows for an upright torso, drive creates full extension at the hips to move the bar, and press is straight overhead with locked out arms and lower body)
4. Teach barbell push jerk
3 coaching points (drive, drive, dip = dip is vertical, shallow, and allows for an upright torso, drive creates full extension at the hips to move the bar, then re-dip under the bar with locked out arms to decrease the distance the barbell travels)
5. Teach barbell split jerk
Teach bottom-up jerk stance. Start from a shortened lunge, then rise so the back knee is 4” off the ground.
3 coaching points (dip, drive, split = dip is vertical, shallow, and allows for an upright torso, drive creates full extension at the hips to move the bar, then split your legs under the bar to receive the bar with locked out arms)
When teaching all of the lifts, refrain from using words like “hip extension” and use more commonplace words such as “jump” to convey the same meaning.
Optional Piece
If you have time and you feel comfortable putting movements into a higher intensity setting, have them perform a workout in a controlled setting as you cue/coach the movements.
3-5 Rounds for Time:
3 Push Press + 3 Push Jerk + 3 Split Jerk
20/15 Cal Bike
*Loading and implement based on coaches discretion
Day 3: Hinging | Time expected 60 minutes
Areas of focus: Learning how to hinge, deadlift, & kb swing
1. Revisit how to brace.
Explain how the “core” is 360. Use plank shoulder tap to demonstrate how to brace and resist flexion/movement. For added challenge difficulty, you can place a softball/lacrosse ball on the small of their back and ask them to shoulder tap from the plank without losing the ball. This will drive home the idea of creating rigidity.
2. Teach how to hinge
Use the “butt-bump” wall method for individuals who are spatially challenged.
Clients will stand a foot length away from the wall and shift their hips back until they make contact with the wall. You will most likely have to block their knees so they do not perform a squat and slide down the wall. Using a PVC Pipe will give the client a good visual to see the PVC Pipe’s path be straight and not down and around their knees. (Slightly bent knees, hips and shoulders move together, tap wall and hold position to familiarize position.)
Add in KB once individual masters the “butt-bump”
Once the client feels confident that they can move from a standing position and reach their hips backs, feel their hamstrings and glutes engaged, then stand back up with difficulty. Progress them to picking up a KB from the ground while performing the same movement pattern with the wall. Clients will have to move further away from the wall to account for the KB coming off the ground and then knee flexion required to meet the KB. If clients struggle with good form reaching the KB, then elevate the KB to meet their range of motion.
3. Teach Barbell Deadlift
The barbell will be slightly in front of their center of mass. Emphasize bracing (have them think about the plank shoulder taps) and the PUSH into the ground rather than PULL off the ground. All points of performance from the “butt-bump” will carry over here. Make sure the client does not shift all of their weight onto their heels because they’re searching for something to reach for with their hips. Ensure an even flat foot.
4. Teach the KB Swing
A dynamic hinging movement. Emphasize this is not a front delt raise but a movement to generate power through the hips. Have the client use the “football hike” method to pull the KB into their hips and then use their hips to PUSH their arms forward as to move the KB. All points of the “butt-bump” and barbell deadlift remain true here. (Slightly bent knees, hips start above knee height, hips and shoulders move together.)
Optional Piece
If you have time and you feel comfortable putting movements into a higher intensity setting, have them perform a workout in a controlled setting as you cue/coach the movements.
EMOM x 6-10 for max reps:
Min 1: 20-sec AMRAP Deadlift/KB Swing
Min 2: 30-sec AMRAP Burpee to 6” Touch
*Loading and implement based on coaches discretion
Day 4: Olympic Lifts | Time expected 75 minutes
Areas of focus: Learning the clean and snatch
1. Revisit how to brace
Explain how the “core” is 360. Use plank shoulder tap to demonstrate how to brace and resist flexion/movement. For added challenge difficulty, you can place a softball/lacrosse ball on the small of their back and ask them to shoulder tap from the plank without losing the ball. This will drive home the idea of creating rigidity.
2. Clean
Explain the movement is a dynamic hinging movement that ends up at the front rack. (Demonstrate the movement)
Sticking with the high hang (hip) clean allows the athlete to effectively learn how to use vertical momentum and stay connected with an object.
After you discuss what is the front rack and how the athlete should hold the bar there, teach the high hang (hip) clean, using the follow progression:
- Simple vertical jumps (small dip, hard jump)
- Simple vertical jump with high pull to ribs
- Simple vertical jump and ¼ squat (with or without elbow rotation if ready)
- Simple vertical jump and full squat (with or without elbow rotation if ready)
- Proceed with MANY reps of this mechanic, as the more you do, the easier it will be to teach the snatch
If you feel the client understands how to move the barbell with their hips, you can further expand the sequence to include the follow progression:
- Hip Power Clean
- “Lat Sweep” barbell drill + Hip Power Clean
- Hang Power Clean
- Power Clean
3. Snatch
Explain the movement is a dynamic hinging movement that ends up overhead. (Demonstrate the movement)
Start with the overhead squat to check for bar position and how comfortable the athlete is overhead (this can direct you to whether or not squat snatching is even an option to try).
Keep vocabulary simple– don’t use weightlifting jargon unless needed. Jump and squat is a very simple drill that can be used without an object to teach an athlete how to generate upwards momentum and pull the body under. PVC can also be used in this progression (or empty hands). After you discuss the grip of the OHS, teach the high hang (hip) snatch, using the follow progression:
- Simple vertical jumps (small dip, hard jump)
- Simple vertical jump with high pull to ribs
- Simple vertical jump and ¼ squat (with or without elbow rotation if ready)
- Simple vertical jump and full squat (with or without elbow rotation if ready)
- Proceed with MANY reps of this mechanic, as the more you do, the easier it will be to teach the snatch
If you feel the client understands how to move the barbell with their hips, you can further expand the sequence to include the follow progression:
- Hip Power Snatch
- “Lat Sweep” barbell drill + Hip Power Snatch
- Hang Power Snatch
- Power Snatch
Optional Piece
If time and you feel comfortable putting movements into a higher intensity setting, have them perform a workout in a controlled setting as you cue/coach the movements.
4-6 Rounds:
5 Hang Power Snatch
5 Front Squats
5 Hang Power Cleans
45 sec Cal Row
*Loading and implement based on coaches discretion
Day 5: Gymnastics| Time expected 60-75 minutes
Areas of focus: gymnastic shapes, kipping, wall walk, handstand hold, and handstand push-ups.
When teaching gymnastics, ensure the client has the requisite strength to hold themselves on the bar in a dead hang and chin over bar, as well as the ability to hold themselves inverted before attempting any/all gymnastics.
Teach Hollow Hold
Teach Hollow Hold. (Global flexion - Upper back slightly rounded, lower back touching the floor, legs held straight and together hovering off the ground)
Progression:
- Deadbug
- Bent Knee Hollow Hold
- Half Bent Knee Hollow Hold
- Hollow Hold
Teach Arch Hold (superman). (Global extension - chest off the ground, hips touching the floor, quads/legs off the ground)
2. Teach How to Kip Demonstrate how to use the hollow hold and arch hold position on the rig. Start with static positions and holds for 10s, then move into how to transition slowly from arch to hollow using core and arms to pull and push you into position INSTEAD of swinging like on a swing set. TTB Progression: Strict Hanging Knee Raises Kipping Knee Raises Kipping Knees-to-Chest Kipping Knees-to-Elbows TTB Kipping Pull-up Progression: Supine Hip Pop Drill Kipping Swing Kipping Swing + Hip Pop Box Assisted Kipping Pull-up Kipping Pull-up
Teach Wall Walk Plank Shoulder Taps Feet On Wall + Hand Shifts/Lift Offs Wall Walk Regression can be plank walk off rower seat or plank walk on box
Teach HS Hold Main point of performance will be to start to develop inverted awareness and bodyline. Start with wall facing HS holds, especially if the client has shown the aptitude to get into position. Individuals sometimes have a fear of kicking up that requires more time spent on their hands and practicing body awareness. Discuss Handstand Push-ups Teaching this movement will highly depend on the client in front of you. Some will be able to handle the stress of this movement on their first exposure, others will need time to build the requisite strength and resilience in their shoulder girdle. You can expose the client to the beginnings of hspu by using pike box hspu to have them begin to understand the tripod base of support and what it feels like to bear some weight on their head/cervical spine.
Optional Piece If time and you feel comfortable putting movements into a higher intensity setting, have them perform a workout in a controlled setting as you cue/coach the movements.
• • 3-5 Rounds:
10 Kipping Knee Raises (TTB)
10 Ring Rows (Pull-ups)
10 Push-ups (HS hold / HSPU)
Day 6: Optional | Time expected 60 minutes
Areas of focus: Teaching wall ball, thruster, OHS, db movements, kb movements, bounding, machines
1. Revisit Squatting Technique
Here you can connect the clean with some other compound movements.
Cue the athletes from the top of the thruster and down. Start with the initial squat clean thruster, pause overhead, then initiate each rep from the top of each thruster on your call
Build on the same concepts with the wall ball.
2. Revisit Hinging Technique Perform: DB and KB deadlift, clean, snatch, swing, and overhead press (if necessary)
3. Teaching Bounding/ Plyometrics: Jump Rope, Double Unders, Box Jumps
Start with basic bounding drills. Assess jumping mechanics via bunny hops & penguin jumps. Then add rope and monitor skill/athleticism with single unders/skipping rope. Explain hand position & wrist action, good jumping mechanics & bounding control.
Start at a low box height to test comfort jumping up to an object. Cue bracing, arm action and powerful drive of legs into floor, along with landing with confidence/placing feet on box during landing. Starting with depth drops from a low height can be a good idea if the member is hesitant to jump to an elevated platform. This can help you assess lower leg strength and control when jumping down from an object. During the step up pay attention to single leg strength & mechanics.
4. Teach Rowing Technique
Order of operations (in the simplest of descriptions): legs, hip/chest, arms, arms, hip/chest, legs Can also discuss flywheel/damper settings
Teach Bike Seat Placement Slight bend in the knee on the down stroke (when leg is “fully” extended) Slight bend in the arm when you go into “full” extension
Optional Piece
If time and you feel comfortable putting movements into a higher intensity setting, have them perform a workout in a controlled setting as you cue/coach the movements.
8-12 Minute AMRAP:
15/10 Cal Row
15/10 Cal Bike
15 Wall Balls
*Loading and implement based on coaches discretion
Want to see how this looks in daily classes?
On-Ramp helps new members integrate into daily classes safely, this way members feel confident and encouraged to hop in with the group. See how our on-ramp system follows a similar structure to our daily affiliate programming.
If you’re curious, click the button below to learn more about the TTT Affiliate Program, we’re here to help.
